

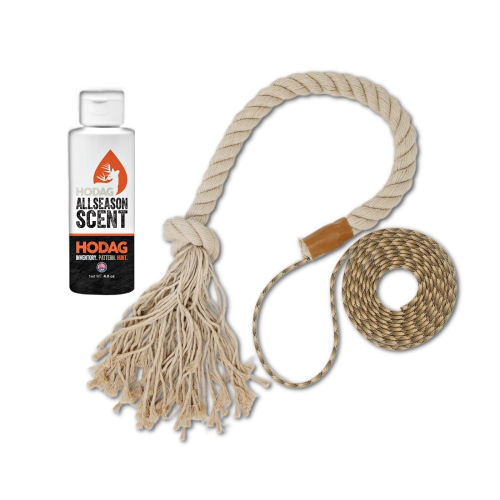
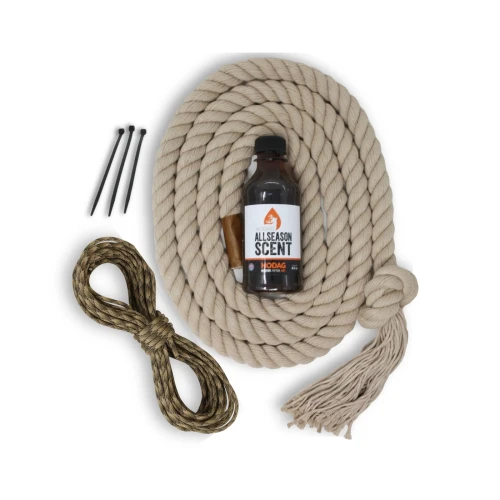
How To Use HODAG HempScent Rope
Choosing A Location
Food plots, logging roads, field edges, & heavily traveled deer trails are all great options. If you are using the HempScent Rope as a hunting aid, hang it where you would like a deer to stop for a shot and serve as a yardage marking reference. If your goal is to inventory your herd, hang your rope in a heavily traveled area.
Please note that prior to placement, you should think about and identify your goals for using the HODAG HempScent Rope. Do you want to use it as a hunting aid for when you are on stand, a scouting tool to inventory the herd, or both? Keep that in mind to determine the best place to set up and achieve your goals!
Watch the full installation video
This video is an example of one way in which we set up our HODAG HempScent Ropes to create a mock scrape. There are many different ways to set up your HempScent Rope. Don't be afraid to get creative!
Watch VideoStep 1:
Attach Rope To A Branch
You can simply bring the bundle of HempScent Rope with you in the field and when you find the set-up area for your rope, cut the rope to fit the situation. We like to have the HempScent Rope hang to the height of a deer's nose (roughly 4 feet) from the ground.
There are multiple ways to "hang" the HempScent Rope and we have had success using Zip ties, wire or paracord. It works great to use paracord to tie your Rope to a branch. Once the paracord is tied to a branch, cut and attach at least 36" of HempScent Rope at the height you want using the paracord.
Step 2:
Prepping The Rope
There is no "Right Way" to prep the HempScent Rope. We have had success just letting the rope unravel completely in the woods or allowing a specific amount of rope to unravel. I like about 5-6" of HempScent Rope to unravel and then I put some type of "tie" around the rope to stop it from unraveling further. I have found that tape, bale twine or paracord work better than Zip ties because they don't leave a sharp edge for a deer to poke its nose on. I will then unravel the 5-6" and apply AllSeason scent up and down the HempScent Rope.
Step 3:
Prepping The Ground
We have found that scraping up the ground like a traditional scrape also helps with interaction. I also like to clear brush from the area to "open" the area up around the scrape.

Quick Tip #1
Avoid False Trail Camera Pics
Attaching the HempScent Rope to a flimsy branch that will blow easily in the wind can increase the likelihood of getting false pics from the camera triggering when the rope is moving. Be sure to attach your HempScent Rope to a steady limb and take your camera off of sensitive mode.
Quick Tip #2
Placing Your Trail Camera
We recommend placing your trail camera 15 to 30 feet from the HempScent Rope. Be sure to clear the area of any weeds or brush that may create false pictures. We highly recommend using the video settings on your trail camera for this application. Our recommended settings are 10 sec. videos in 30 sec. intervals. Using "Normal" sensitivity mode on your camera will help reduce the amount of false pictures.
Quick Tip #3
Cutting The HempScent Rope
There are several ways to cut the HempScent Rope. I typically have a hand saw with me when I'm in the woods. When I know the length I want to cut the HempScent Rope, I step on the rope with both feet and put the saw under the rope between my legs and just pull up towards me. Usually it only takes one pull for the HempScent Rope to cut.
Still Not Getting Interaction?
On occasion you may have a HempScent Rope set-up that is not being used. When that occurs, change the location and put a fresh coating of AllSeason™ Scent on the rope.